Bike Project
Adobe Illustrator, CAD, 3D Printing, Paint Job, Metal Work

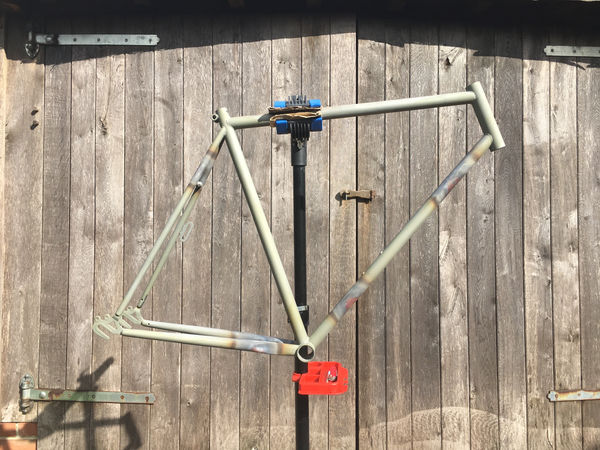
Starting with my Dad’s old steel road bike frame, I wanted to create my own modern racer with a classic feel. By building from the frame up I wanted to learn about every component that goes into a bike whilst learning some new skills and developing old ones. The frame underwent many necessary edits to allow modern components to be fitted on and some custom components had to be made manufactured with 3D printing. To begin the process, my first job was to strip the frame of all the old parts and paint.

One of the first problems I foresore when stripping the bike was that there were no cable guide braze ons on the top tube for the rear brake. This lead to the idea of drilling holes in the top tube and having the brake cable run through inside. However, my ambition for having internal cabling for the back brake quickly escalated to having internally routed cables for the gears too. Not only would this fix my initial problem, but internal cables would help give the frame a minimal feel and look. A potential risk to the frame’s structural integrity, but I was happy to experiment!
To achieve this, the brazed on cable guides for the gears needed to be removed. The method I chose was to heat up the brass with a blow torch until it was soft enough to pull off the cable guides with pliers.

After all the cable guides and any other useless braze ons had been removed, it was time to drill the holes. Using thread to mock up where the cables would run, I could then mark out where the holes needed to be. The holes were made by first drilling through perpendicular to the tube and then tilting the drill to create an elliptical hole.

Any small holes or dents in the frame were then filled in using car body filler and the frame was smoothed down using a file and wet and dry sandpaper.

The frame was now ready to receive a priming coat of paint. I also primed the other parts of the bike that I planned on painting, including the forks, stem and seatpost. It was at this point I realised the amount I had sanded the bare frame was nowhere near enough. So I had to spend a few more hours sanding it down before adding a couple more coats of primer.

Whilst I waited for the primer coat to dry out I had to figure out how the cable housing would fit into the hole I had drilled. Using the Fusion 360 CAD package, I designed a unique type of grommet for each hole. This piece had to allow the housing to fit into it and not provide too much angle for the cable to run through. There were a total of 3 different grommets to fit 8 holes. I then got these parts 3D printed in Polymax PLA, which is a cheap, yet tough, polymer. This would hopefully perform well under the tension of the cable and not fail with a brittle fracture that would leave a piece of plastic stuck within the tube. The external part of the final pieces were buffed up using a rotary tool to remove the layer lines.

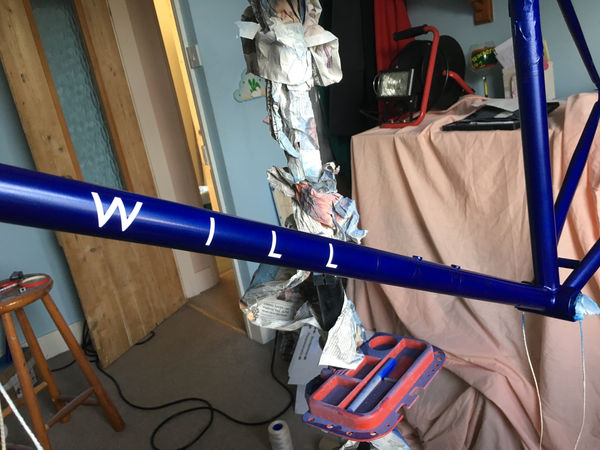
Next to be decided were the decals and colour scheme. Using Adobe Illustrator, I mocked up lots of variations before deciding on the final colour scheme. I also designed a logo, using my initials, and some text that would hopefully act as a theft deterrent! For the text I used Gill Sans, which is used across my personally branded things. These were sent off to be cut on vinyl stickers that could then be used as stencils when spray painting the bike.

Once everything was fitted, it was time for a test run so I could determine the handlebar height. However, once again, I immediately came across a problem. As soon as I put any power through the pedal, the back wheel was pulled out of the dropouts. I found that this was likely to be down to paint being on the dropout where the skewer is meant to grip into the metal. I managed to sand this off and added a locking washer. So far haven’t come across any more issues with this. I got back to test riding and could finally set the handlebar height by cutting the steerer tube to the correct length.

At last, I completed my creation and I am extremely proud of what I’ve put together.
Though the bike is now complete, I can see it being a on going development process to get it perfect. After a bit of riding I can already see that the design of the cabling grommets needs to be changed so that more cable housing fits inside and an aluminium drop bolt needs to be made.


I spent hours umming and ahhing over what is arguably the most important aspect of the bike: the colour of it. After getting inspiration from different cars, I eventually decided on a pearlescent dark blue that is only available on Fiat 500 Abarths. The colour is subtle and reserved, yet when in sunlight has an eye-catching shimmer. Once it arrived, the eagerly anticipated paint job was able to commence. This consisted of a white coat where the decals would be stuck, then a basecoat of blue, and finished with a clear top coat. The decals were applied after the white coat and lined up using thread. They were then peeled off after the blue coat, before the clear coat.

To achieve a well cured and durable finish, bikes are normally put in an oven at this point. Although I didn’t have access to a giant oven, I was fortunate to have an AGA cooker at my parents house that I could use to accelerate the curing process. I decided to utilise the heat coming off the top of the AGA by creating a cardboard and foil oven that the frame could sit inside.

Now that all my painted parts were complete; it was time to put it all together, starting with the headset. Immediately, I ran into a problem. The headset would not fit into the headtube no matter how hard I pushed, despite being labelled the correct size. I measured it with vernier calipers and found the headset to be about 0.5mm too big. Sanding wouldn’t help me here, so I had to use my Uncle’s lathe to try and evenly trim off some of the metal. The lathe worked, but a little too well, and the headset slid in with too much ease. To fix this I used a strip of aluminium from a coke can to pad out the diameter and get a firm fit.

The next challenge was threading the internal cables. To accomplish this, I tied a length of string to the cable and threaded it into the tube. I was then able to suck it out the other end using a hoover. By pulling the string through, the cable followed and came out the other end.

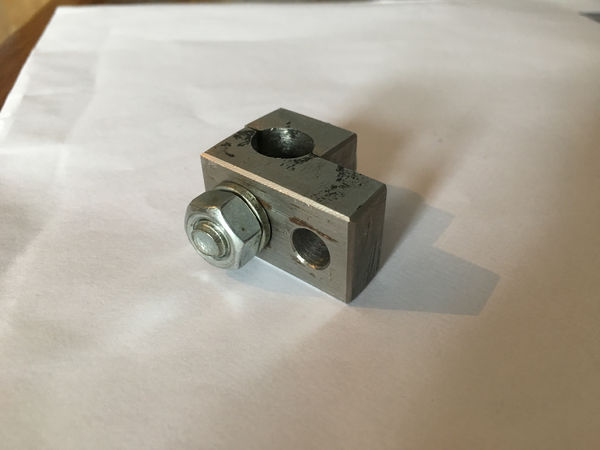
I then came across another serious issue. The wheels weren’t big enough for the frame, meaning that the rear brake caliper wasn’t fixed low enough to clamp down on the rim of the wheel. I needed to create something that would allow me to lower where the brake was attached to the frame. The solution was to create a drop bolt. Using a scrap bit of steel and with the help of my uncle and his workshop, I manufactured a piece that would do the job. However, as steel is extremely heavy, this is only temporary until I can make one out of aluminium and paint it.


