Beer Project
Adobe Illustrator, Logo Design, Process Experimentation

In the Summer after university, my housemates and I started to brew our own beer. I quickly decided that we needed a logo for our brewing “company” and made some glasses with this printed on them.

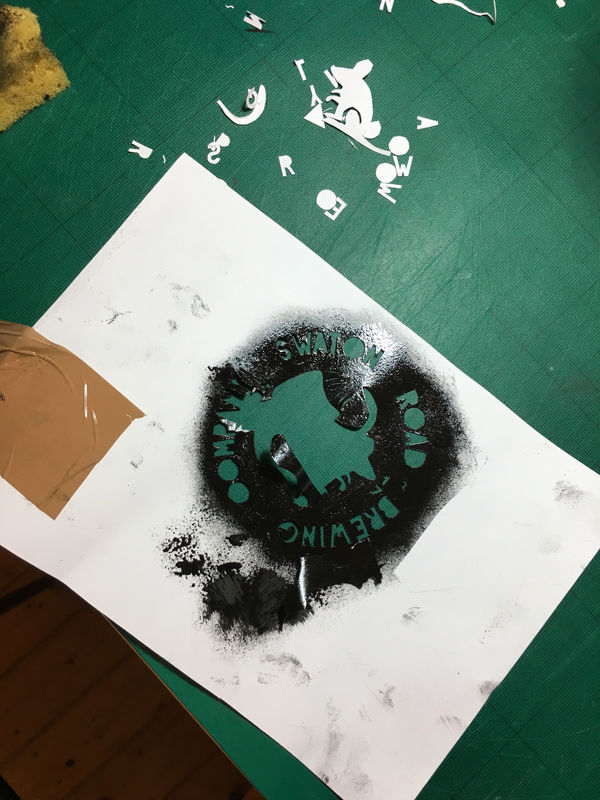
I created the logo using Adobe Illustrator and created the imagery around something my housemates would never forget from their time living on Swaton Road - the mice! After the first logo was designed, I needed a way to get the image onto 4 glasses. Ideally, I would have used a silk screening process, however, this would have ended up being fairly expensive, so I tried a few other methods to stencil the image. An important thing to bear in mind for the logo was choosing a font that would be good for use as a stencil and easy enough to cut out. The first stencilling method I tried was making the stencil out of thick card and spray gluing it the glass, before painting through with enamel paint.

This method didn’t give a very refined edge and the stencil fell apart after one use, which was something I wanted to avoid. I decided this was partly down to the design being too complicated and went back to the drawing board. I also needed to find a way to make a multiple use stencil. My next attempt was using some material from a pair tights as a silk screen. This was held in a unique frame that took into account the curvature of the glass.

Once again this failed to give a refined edge.
I changed the mouse shape to make the design simpler for the final attempt. My final method of stencilling was using sticker paper. Although this didn’t allow for a multiple use stencil, it did give a pretty nice refined edge.

Once the Logo was completed on each glasses, the final touch was to add names to the glasses. Finally the complete glasses were baked in the oven to cure the enamel and make them dishwasher proof.
I was pretty happy with the final result and so were my housemates!


